BIZZ WIZZ INVOICING
CUSTOMER LIST
Bizz Wizz : Setup , Main Menu , Ledger , Phone Book , Invoice Book , Stock Book , Order Book , Creditors , Point of Sale , Business Name , Diary , Wages , Document Manager , Unlock , Backup
See Also : Invoice Main Menu , Invoice List , Customer List , Add and Edit Customers , Sales History , View / Edit Invoice , Age Statements , Pay Invoice , Job Schedule, Service Module , POS Setups , Hot Key Setups
NOTE: By moving the mouse over the buttons, the help box at the bottom of that screen will give you a brief description of the function of that button.
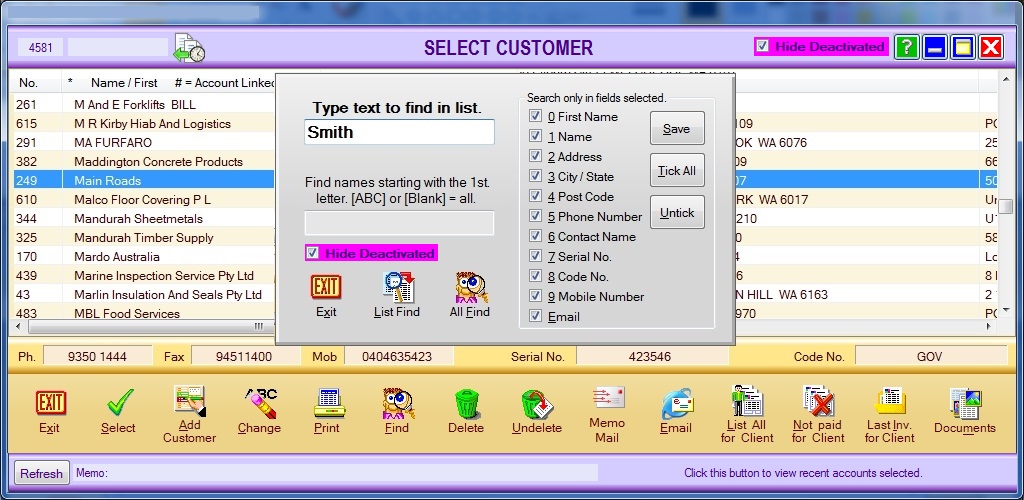
At the top of the window is the number of suppliers accounts in the list.
Then a box showing what has been typed to Auto Find in list.
Then the last selected History Icon when clicked a drop down list
will be seen clicking on one of the names will take you to that name in the full
list.
To the Right is the Hide Deactivated this will stop deactivated accounts
from showing in the list
Click to top of the column to sort by that column. Columns
can also be moved left or right by dragging the top of the column.
Select - Selects the highlighted customer and returns OR starts a
New
Invoice depending on the mode.
Add Customer- If you need to enter a contact go to
Add Customer
Change- First highlight the customer and then click on this button to make any changes needed to the customer record. This will allow you to make changes to the customer's Account record. Make sure you click on the [OK Save] button after making changes to the record.
Print - A Print Menu pop up box will open. If you already have your printer set up click on [Print] to send the customer details straight to the printer. [Print Condensed] will condense the customer's information to be printed. If you need to choose a printer then click on [Print To] which will bring up your printer options. Choose the printer you would like to send the Contact's details to and click on OK. If you click on [Export] the [Select Format] page will open. You can choose from PDF ADOBE, HTML, WORD, JPEG or EXCEL. Click on your chosen option and follow the prompts.
Find- Click to find a Transaction. There are ten fields that you can click on
to find data in. If you want to find the customer by
Name, click only on Name and then enter that Name in the text field. If you want
to find the customer by Phone Number, click only on Phone Number and then enter
that Phone Number in the text field.
If you want to find all customers with
Business Names starting with A, then enter A in [Find names starting with the
first letter. [ABC] or [Blank]= all].
There is a [Save] button that you can
click on that will save the selected field options.
When you go back into the [Find] option only the saved fields will be ticked for you
to locate customer information.
The [List Find] button will search the current
list,
while the [All Find] button will search all the data.
Delete- You can delete a customer if you
highlight then first.
Un-Delete- You can un-delete a customer if that customer was the last
one deleted only and you have not left the screen.
Memo mail - button will start a new memo mail with the customers
details import into the memo automatically.
Email- Click here to open the page to send an
Email to the selected customer. If the Email button is highlighted Green, then the
customer does have an Email Address.
List All for Client - button shows a list of all Invoices for this
customer.
Not Paid for Client - button shows a list of all not paid Invoices for
this customer.
Last Invoice for Client - button shows the last logged Invoice for that
customer
Documents- Click on the [Documents] button to open the Documents Manager page. There are four buttons on the
Document Manager page that are Add/Show a Document, Email Address, Web
Address and the Delete button.
Make a New
Invoice
By Selecting Supplier the make a new Invoice box will show.
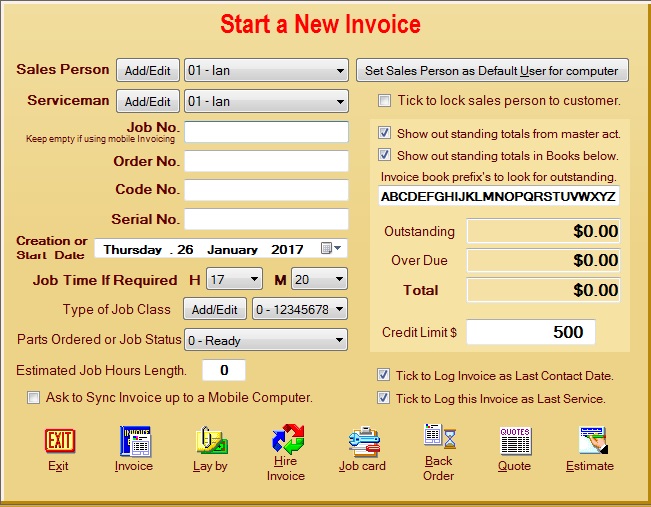
This window will start a new invoice if you do not want to do this then press the exit button.
The button along the bottom of this screen when clicked will make a new
invoice for the selected customer. Depending on the caption of the
button.
There is no need to fill in any of the boxes unless you wish to keep some info
on the invoice or set some other details.
Lock sale person to customer -when ticked will put the same sales
person on every invoice for a account customer
this is used when the customer only deals with 1 rep for his area.
Show outstanding totals from master account - Account can be linked to a
master account, like branches to head office. Ticking this option will
show outstanding for all branches accounts and the head office.
Show outstanding - shows the amounts outstanding for just the selected
account. (branch).
Invoice book perfix's - The to option above will look in the books listed
to find outstanding totals. eg.[ABCD]
Credit Limit - is to let you know when the custom is over a credit limit.
if no limit set to 0. Turns Red When Over Limit.
The Log Contact option - logs the date to the customers record as last
contacted date.
The Log Service option - logs the date and the invoice number to the
customers record as last service and last invoice number.
Ask to Sync Invoice - If you wish to send invoices to mobile invoicing
tick this option and it will ask you if you want to sync or not.
NOTE : there is a way to send invoices to one mobile unit or to another
unit using the serviceman or sales person allocations. For help on this
ring Bizz Wizz or email
See Also : Invoice Main Menu , Invoice List , Customer List , Add and Edit Customers , Sales History , View / Edit Invoice , Age Statements , Pay Invoice , Job Schedule, Service Module , POS Setups , Hot Key Setups