BIZZ WIZZ DIARY
CONTACTS LIST
Bizz Wizz : Setup , Main Menu , Ledger , Phone Book , Invoice Book , Stock Book , Order Book , Creditors , Point of Sale , Business Name , Diary , Wages , Document Manager , Unlock , Backup
See Also : Diary , Add or Edit Appointment , Add Contacts , Contacts List , To-Do List
NOTE: By moving the mouse over the buttons, the help box at the bottom of that screen will give you a brief description of the function of that button.
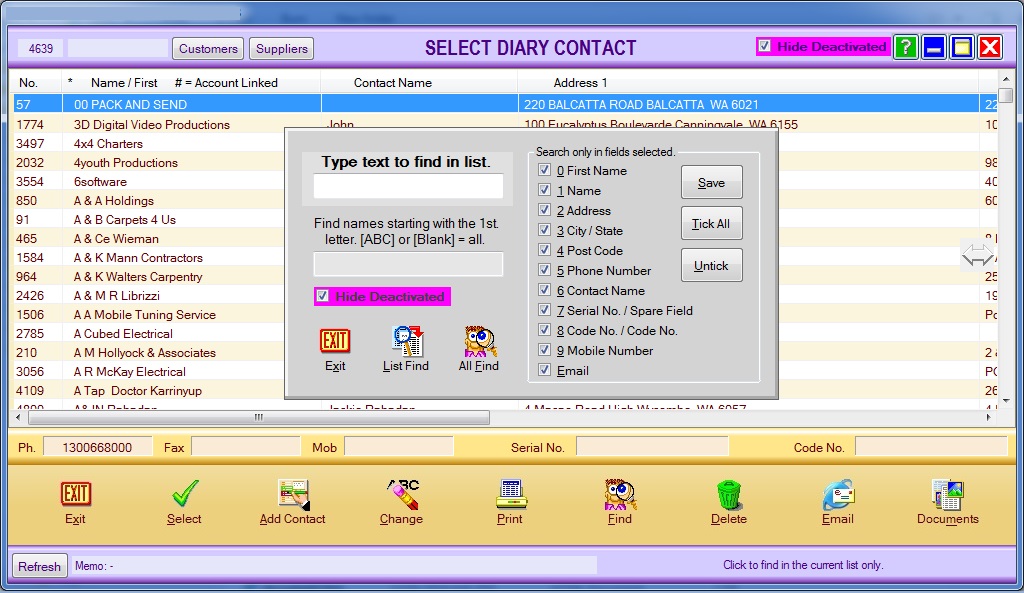
At the top of the window is the number of
accounts in the list.
Then a box showing what has been typed to Auto Find in list.
Then the last selected History Buttons {Customers}&{Suppliers} when
clicked a drop down list will be seen clicking on one of the names will take you
to that name in the full list.
To the Right is the Hide Deactivated this will stop deactivated accounts
from showing in the list
Click to top of the column to sort by that column. Columns
can also be moved left or right by dragging the top of the column.
Select - Selects the highlighted contact for the appointment.
Add Contact- If you need to enter a contact go to
Add Contact
Change- First highlight the Contact and then click on this button to make any changes needed to the Contact record. This will allow you to make changes to the Contact's Account record. Make sure you click on the [OK Save] button after making changes to the record.
Print - A Print Menu pop up box will open. If you already have your printer set up click on [Print] to send the Supplier details straight to the printer. [Print Condensed] will condense the Contact's information to be printed. If you need to choose a printer then click on [Print To] which will bring up your printer options. Choose the printer you would like to send the Contact's details to and click on OK. If you click on [Export] the [Select Format] page will open. You can choose from PDF ADOBE, HTML, WORD, JPEG or EXCEL. Click on your chosen option and follow the prompts.
Find- Click to find a Transaction. There are ten fields that you can click on
to find data in. If you want to find the Supplier by
Name, click only on Name and then enter that Name in the text field. If you want
to find the Supplier by Phone Number, click only on Phone Number and then enter
that Phone Number in the text field.
If you want to find all Contacts with
Business Names starting with A, then enter A in [Find names starting with the
first letter. [ABC] or [Blank]= all].
There is a [Save] button that you can
click on that will save the selected field options.
When you go back into the [Find] option only the saved fields will be ticked for you
to locate Supplier information.
The [List Find] button will search the current
list,
while the [All Find] button will search all the data.
Delete- You can not delete from Diary only form Invoicing and Creditors.
Email- Click here to open the page to send an
Email to the selected Supplier. If the Email button
is the same colour as the other buttons, then this Supplier does not have an
Email Address listed. If the Email button is highlighted Green, then the
Supplier does have an Email Address.
Documents- Click on the [Documents] button to open the Documents Manager page. There are four buttons on the
Document Manager page that are Add/Show a Document, Email Address, Web
Address and the Delete button.
See Also : Diary , Add or Edit Appointment , Add Contacts , Contacts List , To-Do List